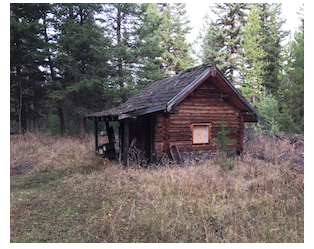
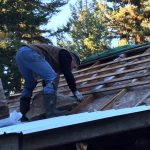
Installing a metal roof on this small cabin was the next step after tearing off the old roof. Once the old shingles and insulation were removed, the structure could finally be prepped and made ready for the new metal roofing.
Before putting the metal on, the roof needed proper ventilation and insulation to prevent moisture problems in the future.
Step 1: Adding Roof Ventilation
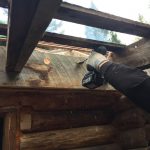
Before starting the roofing process, Scott drilled vent holes in the fascia boards and soffit. These vents allow warm, moist air to escape from the roof space so that condensation and moisture don’t build up over time.
On one side of the cabin there is a shed roof attached to the main roof, so the ventilation holes were drilled directly into the fascia board.
On the other side of the cabin, the holes were drilled into the soffit.
Proper ventilation is an important step when installing a metal roof, especially on an off-grid cabin where moisture control can make a big difference in long-term durability.
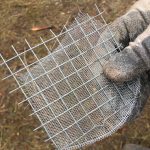
To keep animals out of the roof space, screening was attached to the inside of the vent holes.
We used a small piece of galvanized hardware cloth screen to cover the vent holes, which works well for keeping mice and other small animals from getting into the roof space.
Step 2: Installing the Foam Vapor Barrier
The next step was installing the vapor barrier.
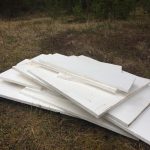
We reused foam insulation that had been removed from the basement of the main cabin. Off-grid building often means making use of materials you already have whenever possible.
The foam insulation was placed on top of the 2×6 tongue and groove roof planking.
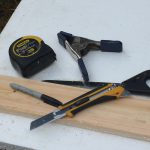
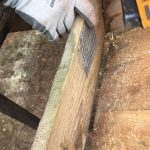
It was my job to cut the insulation to size.
After digging around in Scott’s toolbox, I found what I needed to get the job done. I quickly discovered that the smaller saw worked much better than using an olfa knife for cutting the foam insulation.
A small hand saw for cutting foam insulation made the job much easier and gave cleaner cuts than trying to slice it with a utility knife.
Once all the pieces were cut, they were laid across the roof decking.
Step 3: Sealing the Vapor Barrier
After the foam insulation was installed, all the seams needed to be sealed.
We used sealing caulking that we had left over from when we built our current home.
Fortunately we still had several construction materials on hand that would come in handy while working on both the small cabin and the larger cabin.
Sealing the seams helps create a continuous vapor barrier, which prevents warm interior air from reaching the cold roof surface.
Step 4: Installing the Roof Insulation
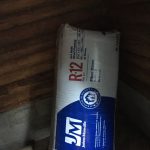
Next came the roof insulation.
We used R-12 insulation, placing it directly on top of the foam insulation.
This adds another layer of thermal protection to help keep the cabin warmer in winter and cooler in summer.
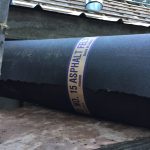
Step 5: Installing Roofing Paper
Before installing the metal roofing panels, the entire roof was covered with roofing paper.
We used standard roofing underlayment paper, which helps create a moisture barrier between the roof decking and the metal panels.
Roofing paper is installed starting at the bottom of the roof.
Each new layer overlaps the one below it as you move toward the top. This overlapping method helps ensure that water runs down the roof instead of working its way underneath the material.
Once the roofing paper was in place, it was stapled down to secure it.
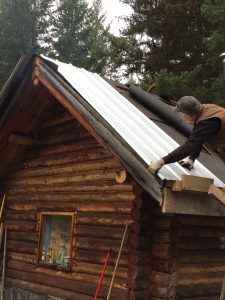
Step 6: Installing the Metal Roofing Panels
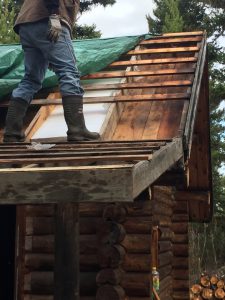
With the roof fully prepped, it was finally time to install the metal roofing panels.
We started with the shed roof and worked our way upward before moving on to the other side of the cabin.
To install the roofing panels, we used a roofing nailer designed for metal roofing.
To install the roofing panels, we used a coil roofing nailer, which makes fastening roofing materials much faster and more consistent than hammering nails by hand.
Installing metal roofing is much easier with the right tools, especially when working on a cabin roof.
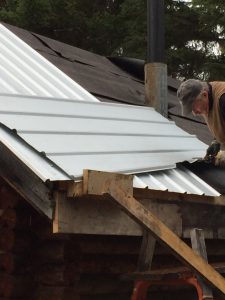
A Homemade Roofing Helper
Sometimes when you need an extra set of hands, you simply make your own tools.
Scott built a simple support that helped hold the metal roofing sheets in place while installing them.
It worked surprisingly well and made positioning the panels much easier.
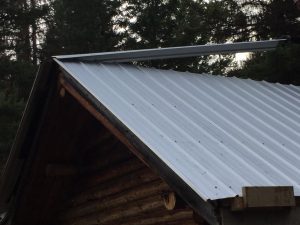
Finishing the Roof
Once all the metal roofing panels were installed, the roof cap was added along the peak.
With the cap in place, the roof installation was complete.
The small cabin now has a durable metal roof that should last for many years and stand up well to the weather at our off-grid property.
Important Note:
This information is for educational purposes only.
This post may contain affiliate links. If you make a purchase through these links, I may earn a small commission at no extra cost to you.
Updated March 2026
© 2016 – 2026, Teresa. All rights reserved.
Hey Jill:
Thanks for the thorough and informative job in this article. Replacing an old metal roof can be a daunting do-it-yourself project. However, with some help from friends, it can be an enormous satisfaction and does not require quite as much skill as some of the other options. It certainly is worth the effort.
Yes I like the metal roof, because where we live we can get alot of snow and it seems to slide off easily. Yes help from friends is great.