Getting started with prepping doesn’t mean spending thousands of dollars or building a bunker in the woods. In fact, some of the most effective beginner prepping plans are built on simple, affordable essentials.
Prepping on a budget is really about choosing the right items — not buying every gadget you see online.
When I first started focusing on being more self-reliant (especially living off-grid), I realized pretty quickly that it’s not about having everything. It’s about having the right things and knowing how to use them when it matters.
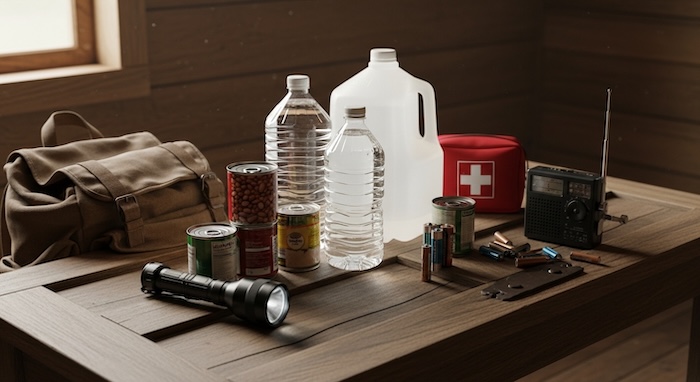
With just $100, you can build a solid emergency preparedness kit for beginners that covers your most important needs: water, food, light, tools, and safety.
And honestly, once you get started, you’ll be surprised how much peace of mind even a small setup can bring.
Why Start Prepping on a Budget
Prepping can feel overwhelming when online lists make it seem like you need a warehouse full of supplies.
But the truth is, most real-life emergencies don’t require extreme setups.
Starting small is one of the smartest ways to begin your prepping journey, especially if you want to build skills without wasting money.
Starting small helps you:
- Avoid wasting money
- Focus on essentials first
- Build confidence step by step
- Learn what actually works for your situation
If you’re working toward a more independent lifestyle, this ties in perfectly with building everyday skills:
👉 50 Ways to Become More Self-Sufficient on a Homestead
The $100 Prepper Plan (Beginner Essentials)
Here’s a breakdown of how to spend your first $100 getting prepared for most situations that pop up unexpectedly. Even a simple kit outshines not being prepared at all.
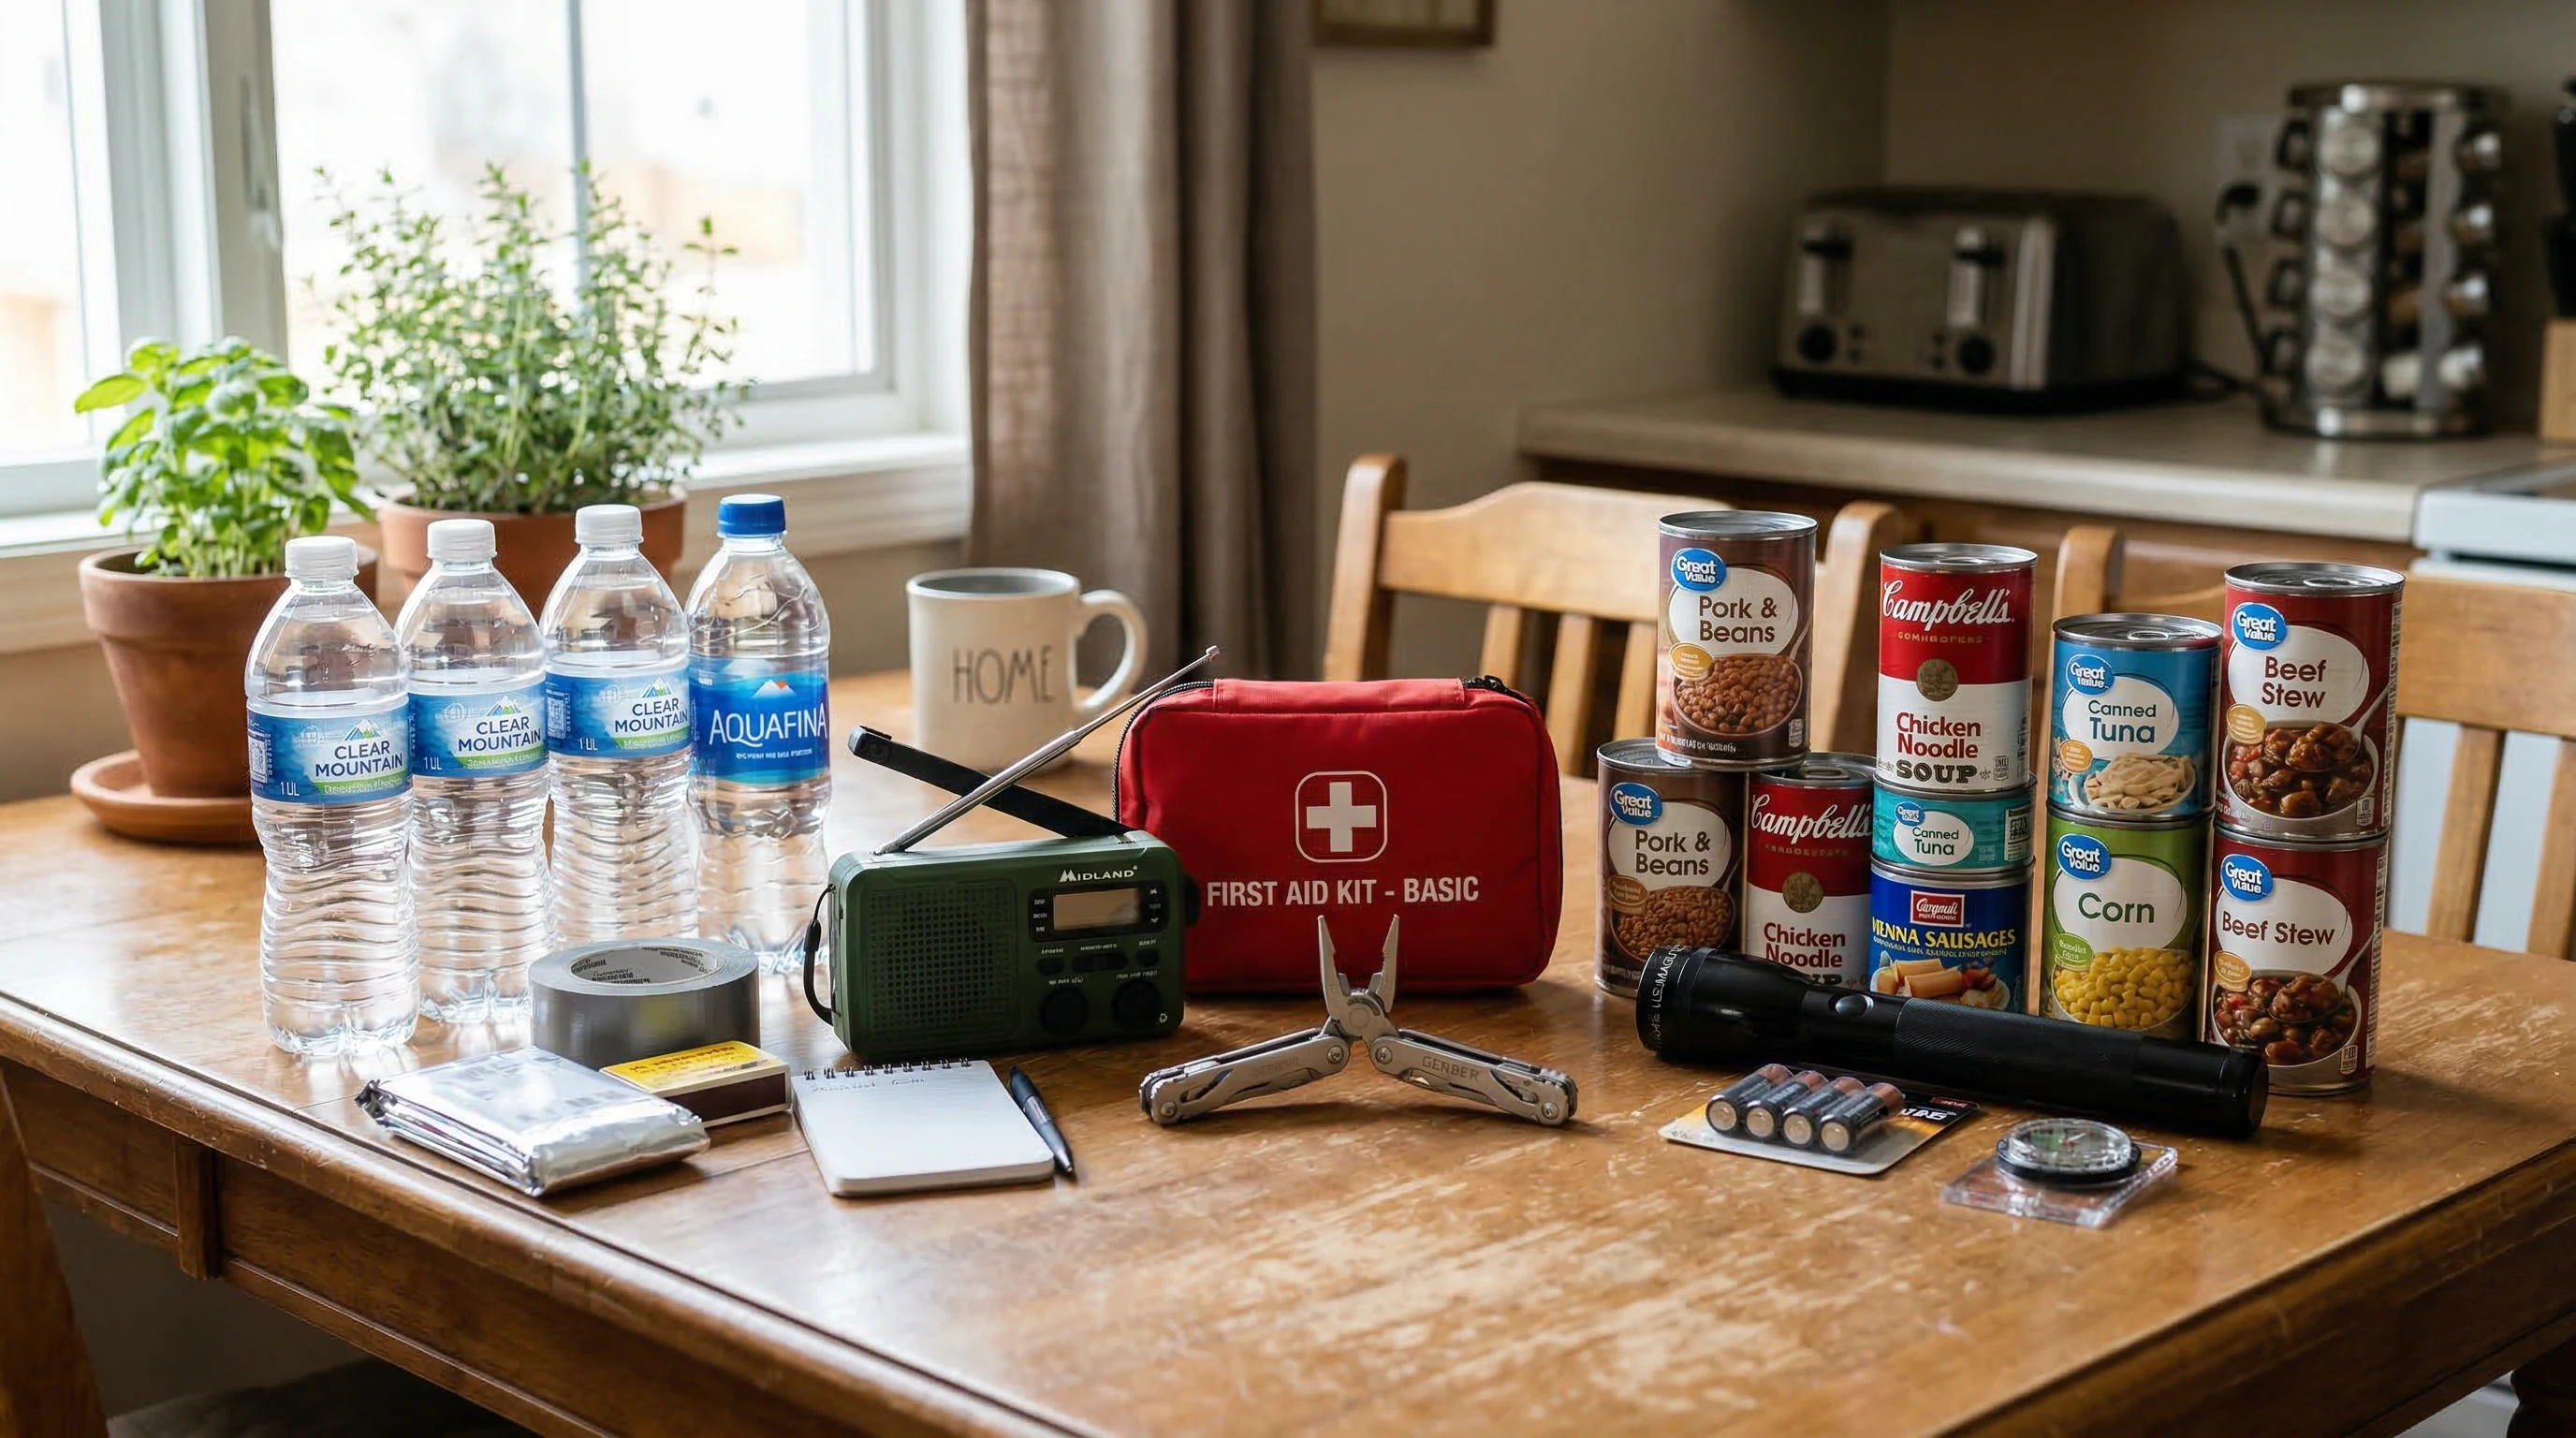
- Water Comes First ($15–$25)
You can survive weeks without food, but only a few days without water — so this is always your top priority.
Start with:
- 2–3 gallons of stored water per person
- Basic water containers
- Water purification backup (like tablets or drops)
👉 This is the type of water storage container I recommend: Reliance Aqua-Tainer 7 Gallon Water Container
👉 And a simple water purification option like this: Aquatabs Water Purification Tablets
Tip: Rotate your water every few months so it stays fresh.
- Emergency Food ($25–$35)
Focus on cheap, long lasting, and easy to prepare foods.
Good options:
- Rice
- Beans
- Oats
- Pasta
- Canned vegetables & meats
These are staples you likely already use. Don’t bother with food you don’t like or won’t eat just because it’s labeled as “prepper food.” That will only waste your stash and your cash.
You can expand this later with food preservation: Best Ways to Preserve Food Without Electricity.
- Light & Power ($15–$25)
When the power goes out, light instantly becomes more important than you might expect.
Start with:
- Flashlight or headlamp
- Extra batteries
- Solar light (optional but fantastic for off-grid needs)
👉 A reliable option like the GearLight LED Flashlight is inexpensive and extremely dependable
👉 For off-grid lighting, I really like solar lanterns like the LuminAID Solar Lantern
- First Aid Basics ($10–$20)
No need for a massive trauma bag yet. Just cover the basics to treat small injuries and block infection.
👉 A simple starter kit like the Johnson & Johnson First Aid Kit covers all the basics
Include:
- Bandages
- Antiseptic
- Pain relievers
- Tweezers
Pack these items in a small, portable container that you can easily grab and go if needed. Consider adding an emergency blanket if your budget allows.
- Communication & Awareness ($10–$20)
Knowing what’s happening during an emergency is crucial. Don’t rely only on your phone; cell networks can go down.
Add:
- Battery powered or hand crank radio
- Notebook plus pen
- Printed emergency contacts
👉 A hand-crank radio like the FosPower Emergency Radio is one of the smartest beginner prepper tools
- MultiUse Tools ($10–$20)
One solid tool can replace several items, which makes this category perfect for budget prepping.
Start with:
- Multitool or basic pocketknife
- Duct tape
- Lighter or waterproof matches
These items are small but incredibly useful for a bunch of quick fixes, repairs, or small challenges.
What This $100 Setup Actually Covers
With just $100, you cover:
- Water
- Food
- Light
- Basic medical needs
- Communication
- Tools
This is already a really solid emergency foundation, honestly way better than what most people have at home.
Where to Go Next (Smart Upgrades)
Once the basics are handled and you feel more secure, begin spotting weaknesses or areas to give a boost. Here are some popular add-ons:
- Water filtration systems for longer use
- Bulk food storage—think big buckets of staples
- Off-grid cooking options (like a rocket stove or small camp stove)
- Solar power for lights or phone charging
- Starting a mini garden for extra food
All of this plays a part in getting you closer to a resilient, independent way of life: Off-Grid Gardening for Beginners.
Common Beginner Prepper Mistakes
There are a lot of pitfalls that can make prepping harder or more expensive than it needs to be. Some things I wish I’d figured out sooner:
- Grabbing fancy gear before you know what works
- Stockpiling food you don’t actually enjoy eating
- Skipping water storage (it’s easier to ignore than you’d think)
- Trying to go big on every front at once, instead of building up with smaller wins
Prepping is a process. You’ll learn a lot more and waste less if you keep making small improvements over time and let your plan develop naturally.
Frequently Asked Questions
Here are a few questions I hear from new preppers all the time:
How long will these basics last in an actual emergency?
If you ration and keep calm, your $100 starter kit could get you through most 3day outages or a solid week. Water and food are the first ones you’ll notice running low, but stretching resources and being creative goes a long way.
What if I want to prep for my whole family?
Multiply food and water for each person and add a few more lights or tools. Bigger families need bigger containers and extra first aid, but the core strategy is exactly the same—start with the basics, then build out room by room.
Is there a way to save even more money on supplies?
Absolutely! Use discount and dollar stores, thrift shops, and swap meets any time you can. Watch out for deals, clearances, or friends looking to trade gear. Prepping doesn’t have to be expensive when you keep an eye out for bargains.
What if I live in a small apartment?
No problem. Choose shelf stable foods, compact water storage, and lights that tuck into small spaces. Portable kits and basic tools fit under most beds or in cupboards, so you can stay safe without cluttering your home.
Final Thoughts
You don’t need a big budget to get started with prepping; you just need a smart plan and a steady approach. That first $100 isn’t about stockpiling everything under the sun, but about getting on track for real self reliance. A little consistency means you’ll soon feel the difference, and prepping will start to fit naturally into your lifestyle. It’s not just for emergencies—this is about the freedom and confidence of knowing you’re ready for what comes your way. With even a simple $100 kit, you’re already ahead of the game.
Disclosure:
Content on this site is for informational purposes only and reflects personal experience and research. Off-grid living laws and conditions vary by location, so readers should always verify local regulations before making decisions. Some links may be affiliate links, which help support this site at no additional cost to you.
© 2026, Teresa. All rights reserved.